Showing posts with label Technical Files. Show all posts

Friday, 4 December 2015

Bridal hairstyle

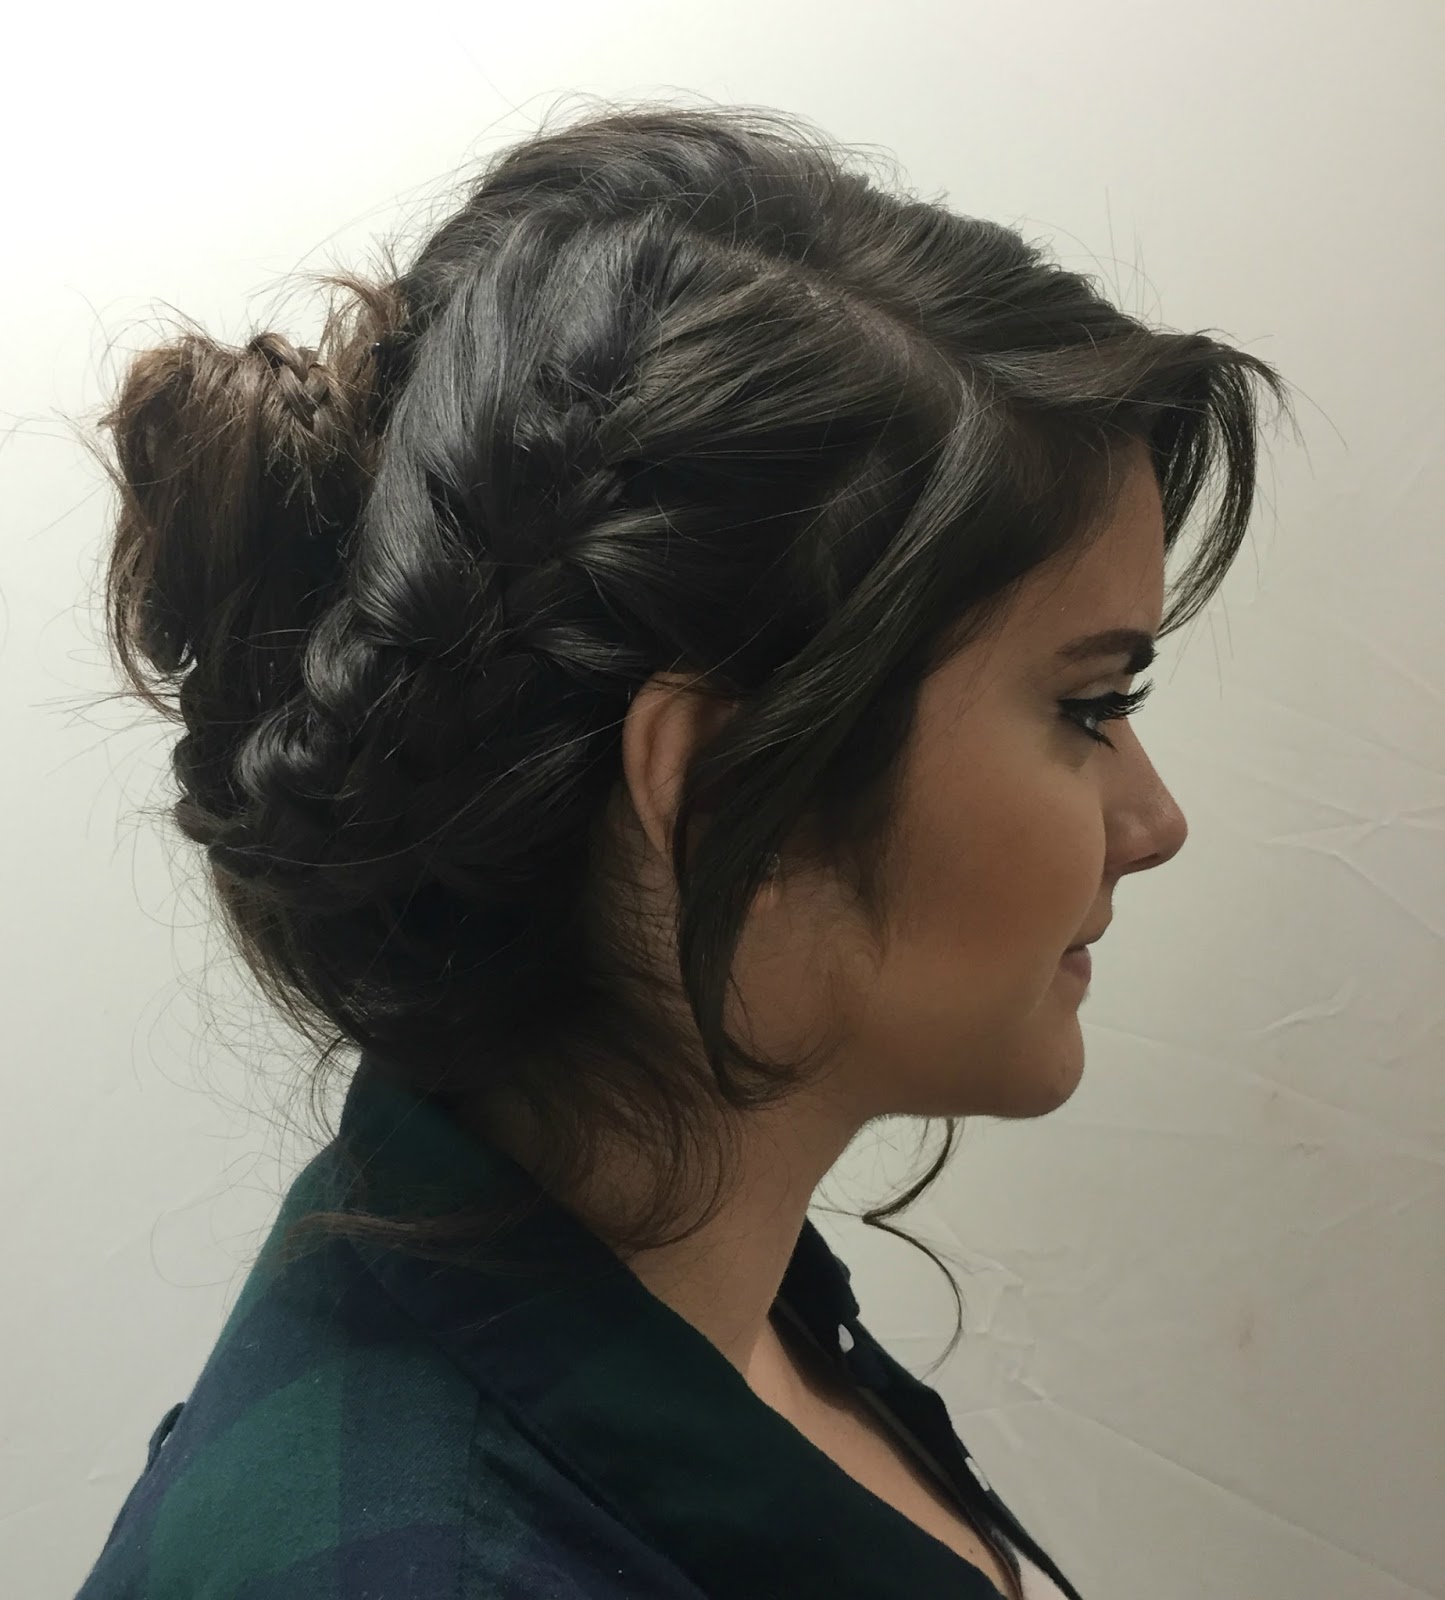
In this practical, we had to produce a bridal hairstyle on an actual person rather than our Katie heads. I chose to work with Sophia. Part of the task was to include plaits and have some sort of up-do, including the use of a straightener/curler or crimper.

Before the lesson I did some research on bridal hair and looked up different styles of up-dos and plaits. I also watched YouTube tutorials which helped me come up with a final idea. I didn’t want to do something too extreme or sophisticated. I wanted to keep it simple yet elegant.

Inspiration:


Courtney Lundquist (2014) Quick & easy braided messy Updo | Maria Menounos Oscars inspired | spreadinsunshine15. Available at: 
https://www.youtube.com/watch?v=51HMwOa3Q_8 (Accessed: 4 December 2015).

Step-by-Step guide:
  1.        Firstly, brush the hair to get rid of any knots.
  2.        Section the hair into 4 parts.
  3.        Starting at the lower section (nape), take small amounts of hair and curl them using the wand.
  4.        Do this all the way around the entire head.
  5.        Now, you will need to part the hair to one side using a pin tail comb. You may ask your model what side they prefer, or how they usually do it themselves.
  6.        The side with the less amount of will need to be plaited. (This will be a loose French braid). Continue the plait all the way down until you reach the ends of the hair and secure it with an elastic band.
  7.        The remaining hair will be put into a wrap bun at the back. Once you have secured the bun with hair grips, wrap the plait you created on the other side around the bun. Secure this with hair grips.
  8.        You may curl the front parts of the hair e.g. the fringe again if you wish to. 


I was really pleased with the final look. I was quite nervous beforehand about working on Sophia in case I hurt her head or burnt her by accident as it’s happened to me a lot before at salons. I have done hair before in my previous course and during work experience at Toni & Guy and to be honest it’s not my favourite thing to do. I get really paranoid and anxious about what I’m doing. I tried to communicate with Sophia and told her to be completely honest with me if I did anything wrong however she was completely fine.

Luckily, I managed to finish the look on time which was something I was worried about. Sophia had beautiful hair to work with however it was very long. Whilst I was curling it, my hands started to ache towards the end. I wasn’t so pleased with the curls because after I had curled the entire head, I realised I was using the wand incorrectly. Fortunately, Helen was there to point this out to me so I don’t repeat it in future lessons.

Thursday, 3 December 2015

Padding

Padding – roll technique:

For this practical you’ll need a ‘hair rat’ to create height and shape. You’ll also need hair grips, elastic bands, hair pins, sectioning clips and a crimping iron.

Step-by-Step guide:
  1.        Firstly, brush the hair to get rid of any knots.
  2.        Crimp the entire head and brush it out to create frizz.
  3.        Section the hair into three. A right side, a left side (centre parting) and the bottom half (just beneath the ears). You may want to clip the bottom half to get it out the way.
  4.        You’ll be creating two heart shaped buns. One side will be done using a hair rat and the other by just backcomb.
  5.        Take a section (I chose left) from the top of the hair. Ensure it is thick enough to cover the hair rat.
  6.        Hold the hair rat on the ends of the hair and roll it under until it’s completely tucked underneath. Pin down the hair rat. Don’t be afraid to rip it. Ensure it is not showing.
  7.        Now for the other side, you’ll need to create a similar sort of shape without the use of padding. You can do this by backcombing the section, and gently creating a half a heart shape with your fingers. Secure the shape with grips once done.
  8.        You should notice a difference between where you used padding and where you didn’t.


Plait support:

Step-by-Step guide:
  1.        French braid a small section of hair behind one of your top sections (I chose left). Continue on this plait until you reach the ends. Secure it with an elastic band.
  2.        Turn this braid back on itself and secure the ends using hair grips.
  3.        Now place the hair rat on top of this plait and again secure it using hair grips.
  4.        Take the top section of your crimped hair and cover the padding to create a half heart shape. Secure the ends of the hair with grips. Again, don’t be afraid to rip it.

Crimping - practical

Crimping (using an iron):

Required equipment: crimping iron, Denman brush, paddle brush, sectioning clips and a pin tail comb.

Step-by-Step guide:
  1.        Firstly, brush the hair to get rid of any knots.
  2.        Using your pin tail comb, section the area you wish to crimp (easier to start at the bottom and work your way up).
  3.        Ensure the width of your desired section is no longer than the width of the crimper.
  4.        Clamp the crimper on the hair for 6-8 seconds
  5.        Repeat this working you way down until you reach the ends of the hair.
  6.        For the roots, ensure you get as close as you can to the scalp as you don’t want any straight hairs.
  7.        Once you’ve done the entire head, wait for it to cool down.
  8. .       Brush out the crimps using a paddle brush in order to create volume and frizz.


Zigzag method:

Required equipment: hair pins, hair grips, Denman brush, paddle brush, straightener, sectioning clips and a pin tail comb.

Step-by-Step guide:
  1.        Firstly, brush the hair to get rid of any knots.
  2.        Using your pin tail comb, section the area you wish to crimp. Make sure it’s not too big.
  3.        Wrap the hair around your hair pin in a figure 8 shape, starting from the root of the hair.
  4.        Push the hair down on the pin once you run out of space.
  5.        Secure the ends of the hair using a hair grip in order to hold it in place.
  6.        Using a straightener, clamp over the hair for 6-8 seconds.
  7.        Move onto a different section whilst the previous one cools down.
  8.        Once all sections are complete, take the hair grip out and pull the pin out of the hair.
  9.        You should achieve a zigzag pattern. You may use a paddle brush in order to create volume and frizz. 

Curls - practical

Spiral curls:

Required equipment: hair grips, Denman brush, sectioning clips, a tong and a pin tail comb.

Step-by-Step guide:
  1.        Firstly, brush the hair to get rid of any knots.
  2.        You must section the hair into two parts, preferably starting from the nape.
  3.        Take a small section of hair and wrap it around in the tong. Ensure to do this in a DOWNWARDS direction, meaning the tip of your tong must be facing the floor.
  4.        Keep the hair on the tong for a good 6-8 seconds then let go.
  5.        For the next section of hair, wrap the hair around in a different direction e.g. upwards, meaning the tip of your tong must be facing the ceiling.
  6.        Repeat this all around half of the head, always taking small sections.
  7.        Once you are done, wait for the hair to cool down. Then, very gently using a pin-tail comb brush through the hair to separate the curls. 


Lift curls:

Required equipment: hair grips, Denman brush, sectioning clips, a tong and a pin tail comb.

Step-by-Step guide:
  1.        Firstly, brush the hair to get rid of any knots.
  2.        You will now be working on the other side of the hair, again using only small sections of the hair.
  3.        This time, hold the end of your desired section to the tong and clamp down.
  4.        You must twist in an UNDER direction in order to create lifts.
  5.        Curl right up to the roots of the hair for volume.
  6.        Keep the hair on the tong for a good 6-8 seconds then let go.
  7.        Once you’ve released the clamp, the section should look similar to a barrel curl.
  8.        Grip the section using a hair grip in order to hold the hair in that shape.
  9.        Once you are done, wait for the hair to cool down. Then, very gently using a pin-tail comb brush through the hair to separate the curls. 


Brickwork:

Required equipment: hair grips, Denman brush, sectioning clips, a tong and a pin tail comb.

Step-by-Step guide:
  1.        For this part, you’ll be working on a wide section at the back of the head. Brickwork is similar to the lift curl method however this time you’ll be holding the tong sideways.
  2.        Start from the top part of your section. You’ll be working your way down, like an upside down pyramid.
  3.        Keep the hair on the tong for a good 6-8 seconds then let go.
  4.        Once you’ve released the clamp, grip the section using a hair grip in order to hold the hair in that shape.
  5.        Start with one curl, come down to two and finish with three. 

Sunday, 29 November 2015

Plaits - practical

Three strand plait:

Required equipment: hair/elastic band, Denman brush and a pin tail comb.

Step-by-Step guide:
  1.        Firstly, brush the hair to get rid of any knots.
  2.        Choose the section you wish to plait and separate it into 3 sections of hair.
  3.        You must take the right section and cross it over to the middle section.
  4.        Next, you must take the left section and cross it over to the middle section.
  5.        Repeat this all the way down until you reach the tips of the hair.
  6.        Use an elastic/hair band to tie the plait.

French plait:

Required equipment: hair/elastic band, Denman brush and a pin tail comb.

Step-by-Step guide:
  1.        Firstly, brush the hair to get rid of any knots.
  2.        Choose the section you wish to plait and separate it into 3 sections of hair, as if you were doing a regular plait.
  3.        Continue to do this however every time you bring a section into the middle, grab a section of hair from that side and bring it into the plait. (The tighter the plait, the better the results.
  4.        Repeat this all the way down until you reach the tips of the hair.
  5.        Use an elastic/hair band to tie the plait.

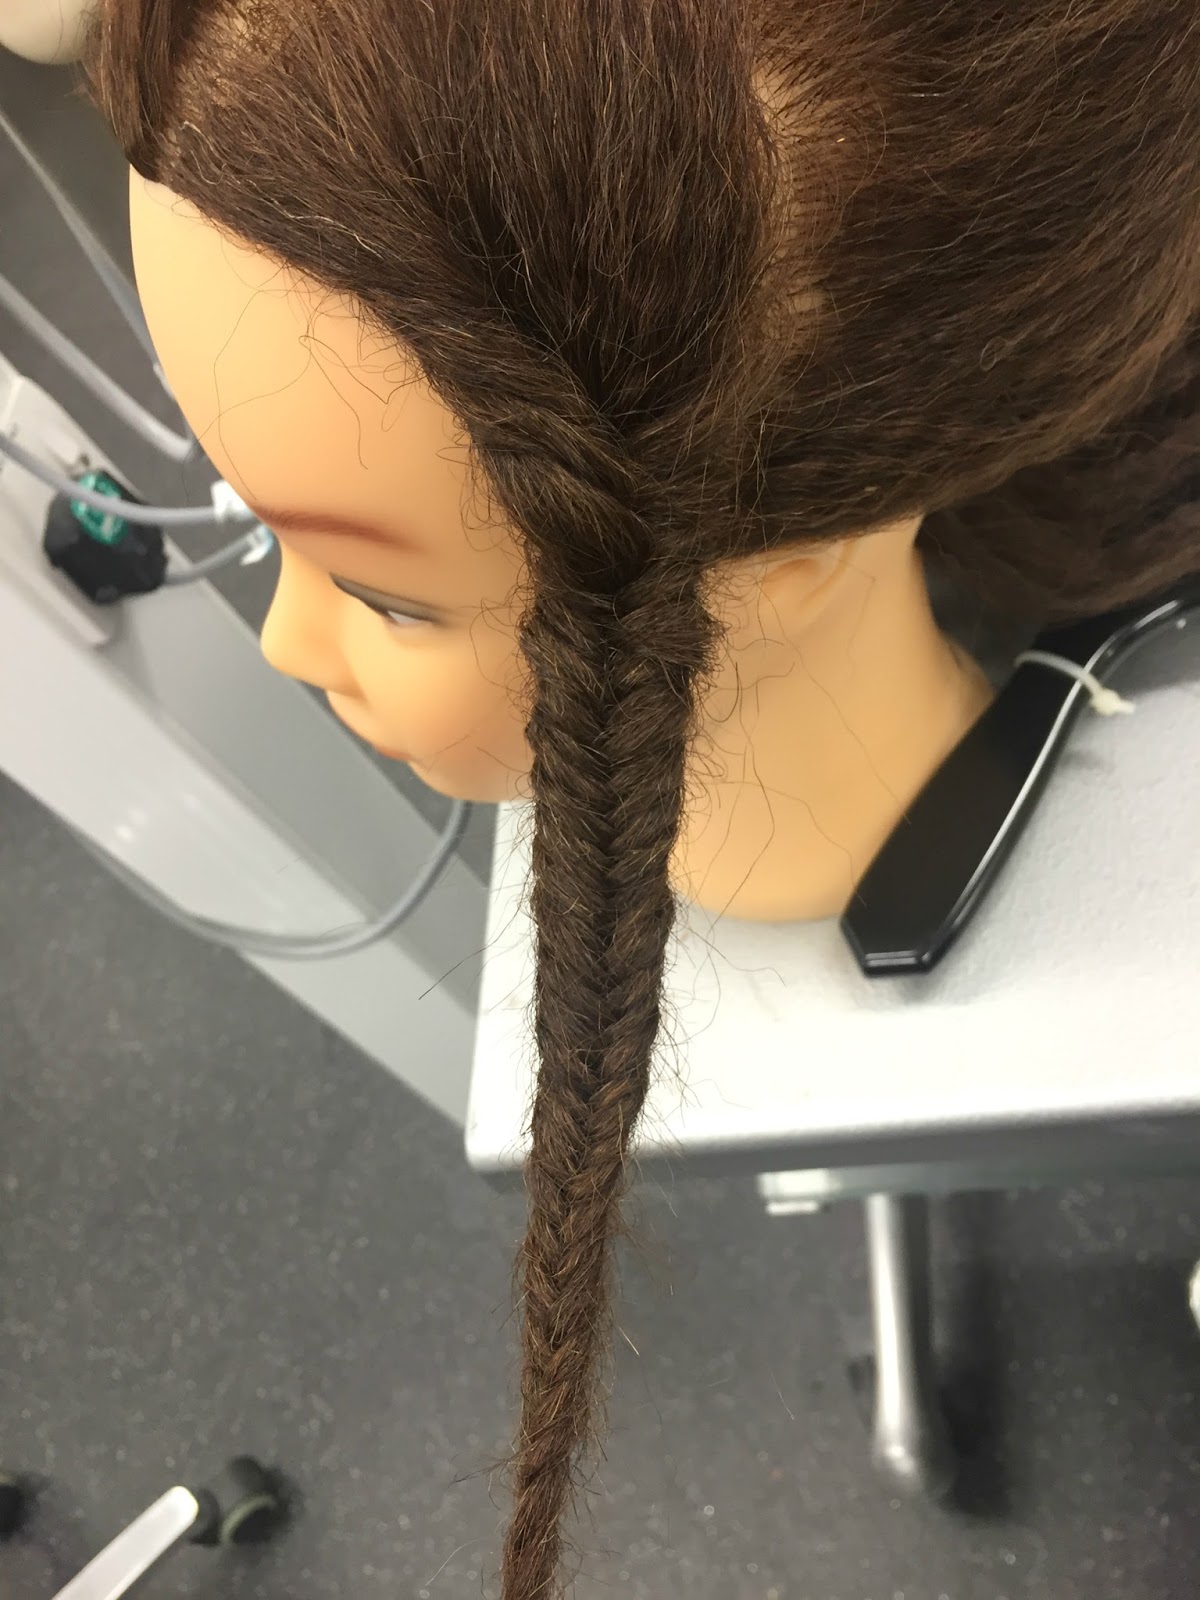
Fishtail plait:

Required equipment: hair/elastic band, Denman brush and a pin tail comb.

Step-by-Step guide:
  1.        Firstly, brush the hair to get rid of any knots.
  2.        Choose the section you wish to plait and separate it into 2 sections of hair. 
  3.        Take a small outer section of hair from one side (either left or right) and cross this piece of hair over to the other section of hair.
  4.        Repeat this all the way down until you reach the tips of the hair.
  5.        Use an elastic/hair band to tie the plait. 

Buns - practical

Four section bun:

Required equipment: hair pins, hair/elastic band, Denman brush, sectioning clips and a pin tail comb.

Step-by-Step guide:
  1.        Firstly, brush the hair to get rid of any knots.
  2.        You must section the hair into two parts (a top half and a bottom half).
  3.        Next, put the top half of the hair in a high ponytail and leave the remaining hair down.
  4.        The hair you have tied up should be separated into 4 different smaller sections. 
  5.        Take the first section and backcomb it from the root to the middle in order to create lift.
  6.        Smoothen your backcombed section using a comb and roll this forward as if you were creating a loop/barrel shape. 
  7.        Using a grip, secure this section down.
  8.        Do the same with the 3 remaining sections.
  9.        Once all sections are complete, you’ll notice gaps where the loops aren’t joined. Using a hair pin, push the hair to close these gaps.

Wrap bun:

Required equipment: hair pins, hair/elastic band, Denman brush, sectioning clips and a pin tail comb.

Step-by-Step guide:
  1.        Firstly, brush the hair to get rid of any knots.
  2.        You must section the hair into two parts (a top half and a bottom half).
  3.        Next, put the top half of the hair in a high ponytail and leave the remaining hair down.
  4.        Twist/wrap the hair that is in the ponytail around until it starts to form a round shape.
  5.        Using booby pins, tuck in the ends of the hair to hold it in place.

Plait bun:

Required equipment: hair pins, hair/elastic band, Denman brush, sectioning clips and a pin tail comb.

Step-by-Step guide:
  1.        Firstly, brush the hair to get rid of any knots.
  2.        You must section the hair into two parts (a top half and a bottom half).
  3.        Next, put the top half of the hair in a high ponytail and leave the remaining hair down.
  4.        Plait the hair that is in the ponytail (a basic plait).
  5.        Twist the plait around in a circular shape (similar to the wrap bun).
  6.        Using booby pins, tuck in the end of the hair to hold it in place.